Authentication
Hoseki Connect Authentication Flow
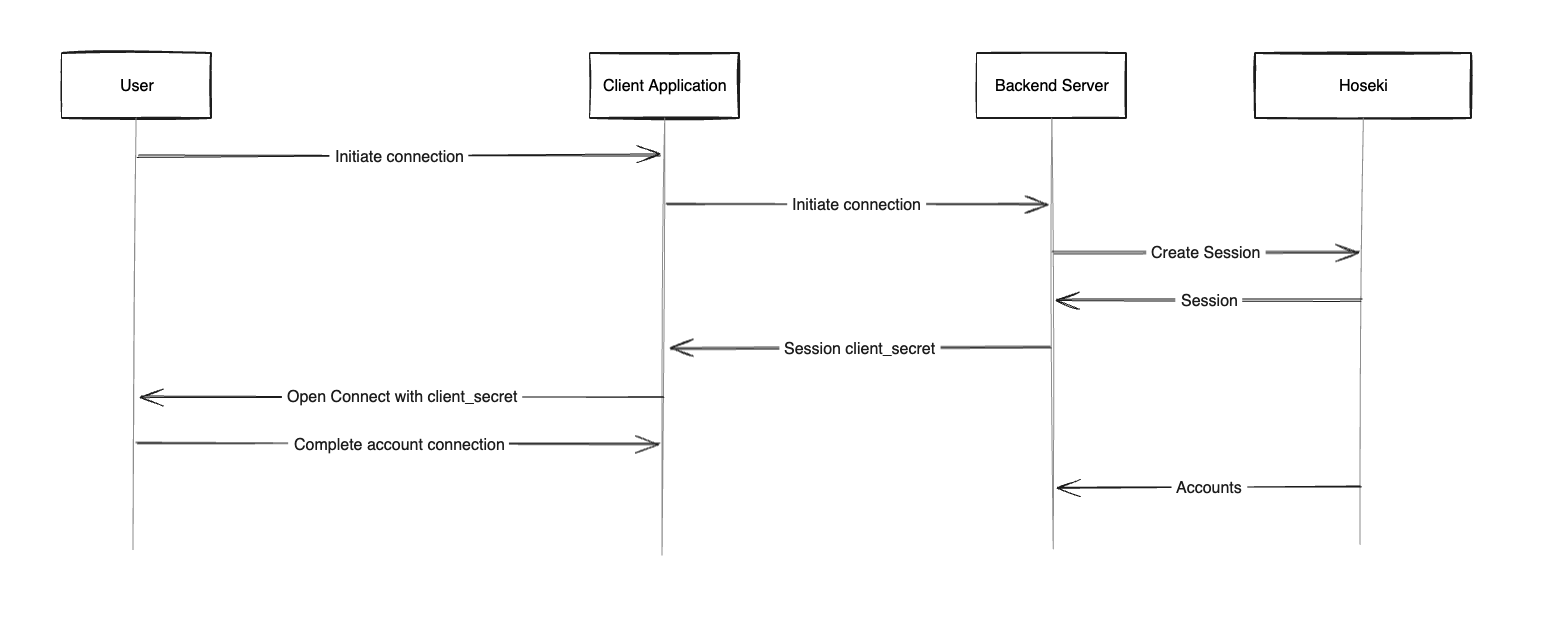
Hoseki Connect is purpose-built to facilitate two primary functionalities: authentication of end-user accounts and data retrieval from these accounts. This section provides a detailed guide on initiating and completing the Hoseki Connect authentication process to access account data.
-
Initiation by Client Application: The end-user initiates the account connection process within your client application.
-
Session Creation: Generate a session on your server to manage the authentication flow. This session acts as a bridge between your client and Hoseki's services.
-
Client Secret Transmission: Transmit the session’s client_secret back to your client application to proceed with the authentication.
-
Authentication by Client User: To continue the authentication process, you will need to integrate Hoseki Connect on your client. To do so, follow our Integrating Hoseki Connect UI guide.
Client-Side User Interface
The authentication process involves a client-side user interface that allows users to approve data sharing and link their accounts with your application and Hoseki. This interface should be opened in a browser tab. It is designed to be compatible with all major web browsers in desktop and mobile operating systems.
API Authentication
Access to the Hoseki API requires API keys that authenticate requests. These keys are highly sensitive and should be safeguarded; exposure in public repositories (such as GitHub) or client-side code should be avoided.
Bearer Authentication: To authenticate API requests, include the header
-H "Authorization: Bearer <your API key>"in your HTTP requests.
Secure Communication: All API requests must be transmitted over HTTPS. Requests made over HTTP or without proper authentication headers will be rejected.
Following these guidelines, you can securely integrate Hoseki's functionalities into your application, ensuring robust data security and a seamless user experience.